This article covers setting up Mail in Mac Mail.
Click >Mail > Preferences… and click on the Accounts tab
Click the + button, to add a new account:

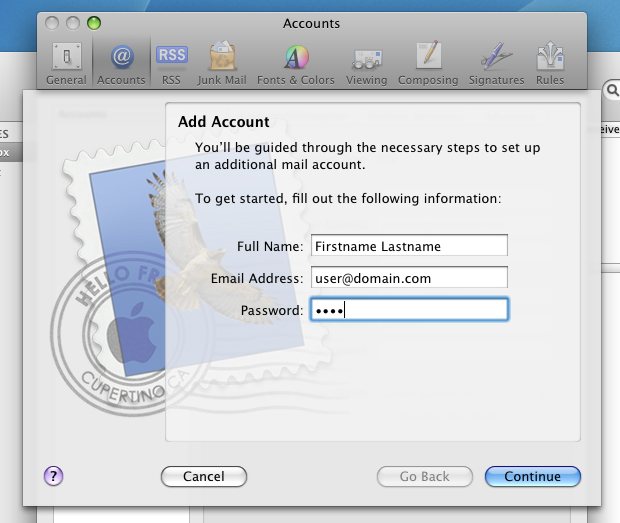
Fill in the window with:
deselect the box labeled ‘Automatically set up account’
Full Name: [your full name here]
Email Address:Â [username@domainname.com]
Password:Â your email account password
Click Continue and fill in the following information:
For POP:
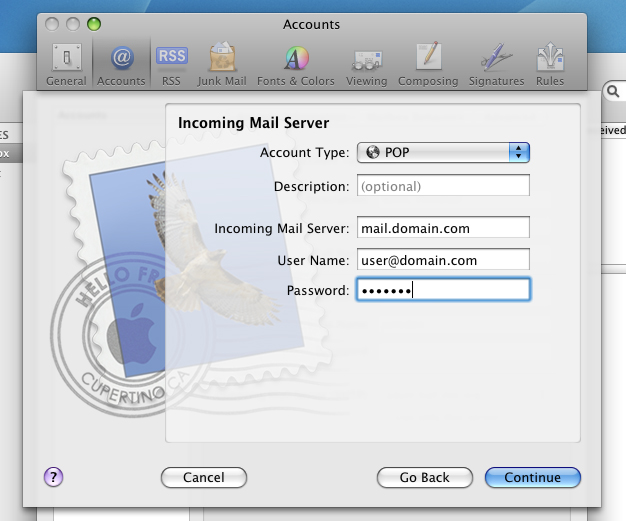
Account Type: select POP
Incoming Mail Server: Change to [mail.domainname.com]
User Name: your full email address [username@domainname.com]
Password: enter your email account password
A pop up will ask you to Verify Certificate, click Connect
It will now check your connection to the server
For IMAP:
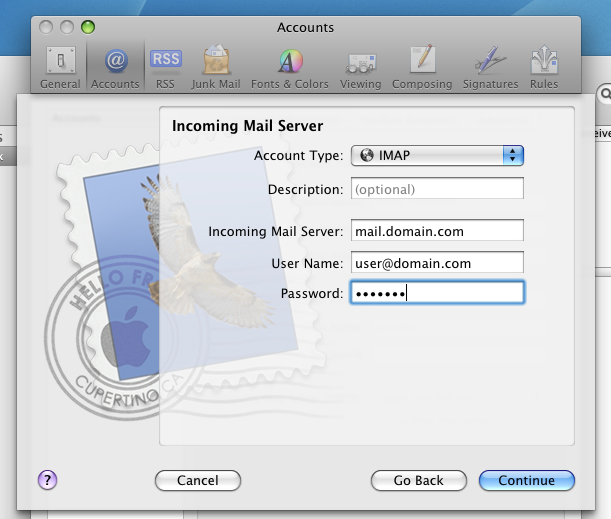
Account Type: select IMAP
Incoming Mail Server: Change to [mail.domainname.com]
User Name: your full email address [username@domainname.com]
Password: enter your email account password
A pop up will ask you to Verify Certificate, click Connect
It will now check your connection to the server
Outgoing Mail Server:
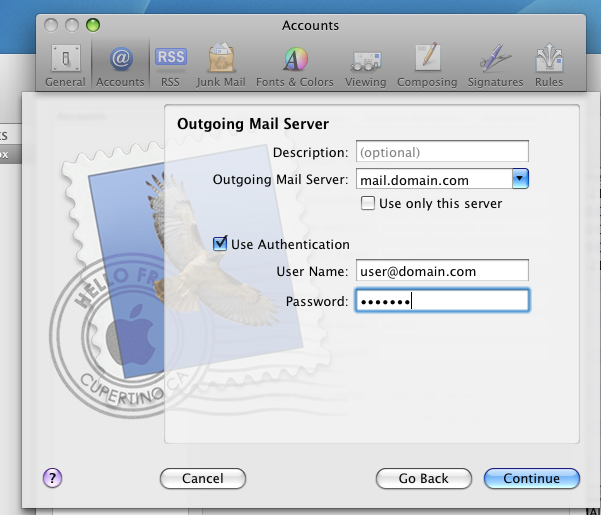
Outgoing Mail Server:Â Change to [mail.domainname.com]
Use Authentication: selected
User Name: your full email address [username@domainname.com]
Password: enter your email account password
A pop up will ask you to Verify Certificate, click Connect
Account Summary: review your account
Make sure Take Account Online is checked
Click Create
